Establish Delegations – Internal Service Delivery Approvals
Note: All Asterisks (*) need to be completed.
Your screens and processes may vary from those described here.
1. The My Delegations page will display:
- Under the Current Delegations tab, click Manage Delegations.

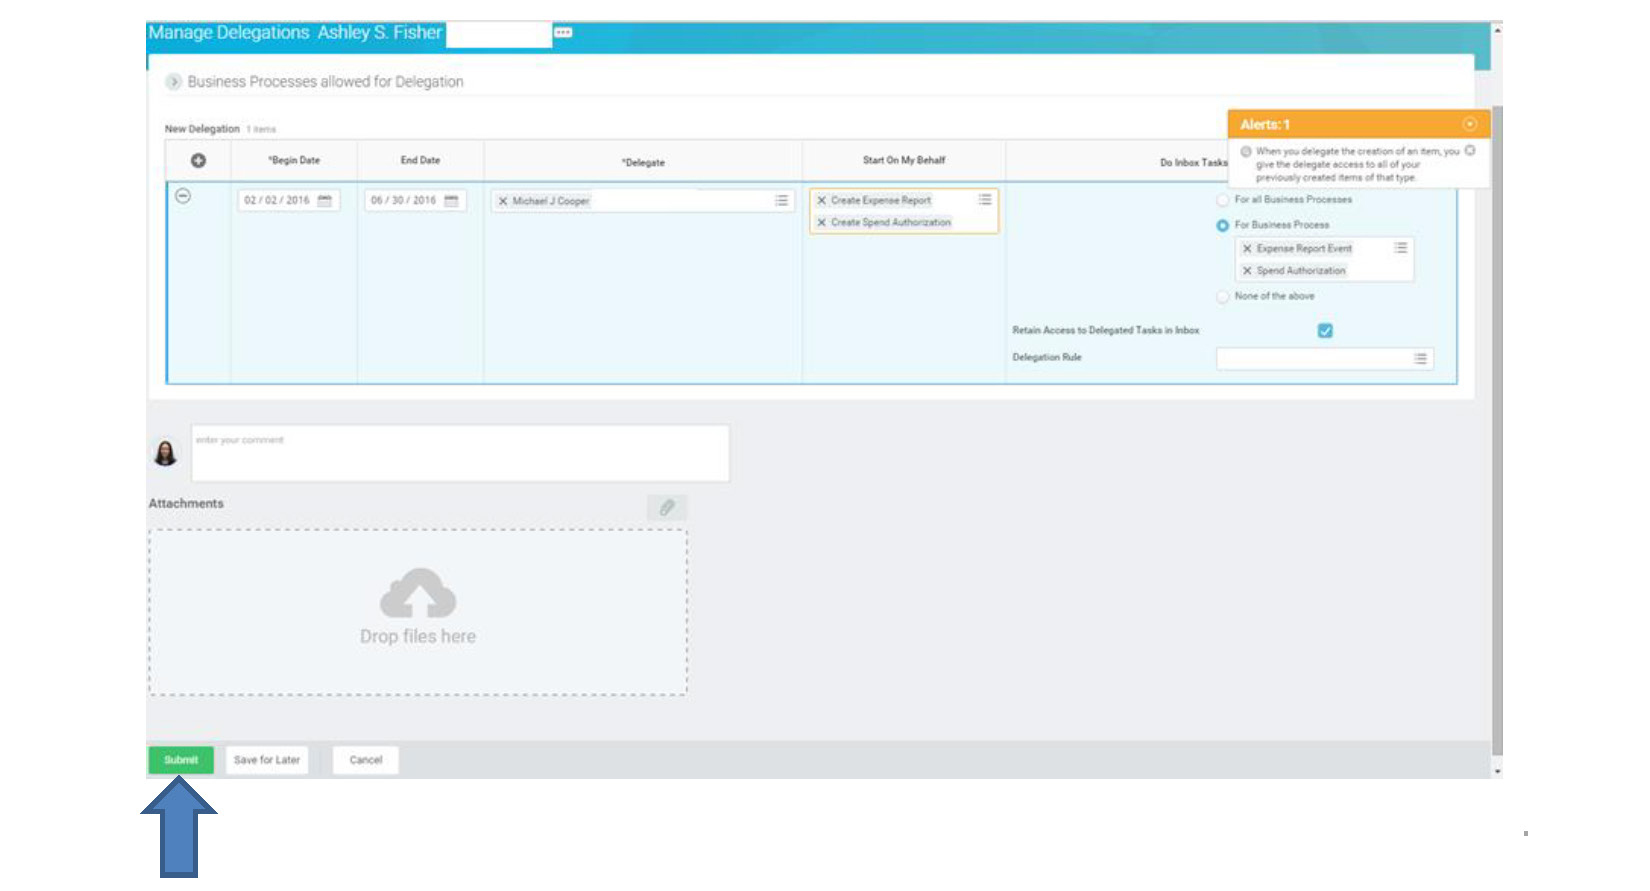
2. Under Manage Delegations, the Business Processes allowed for Delegation will display. This is where you will set up your delegate.
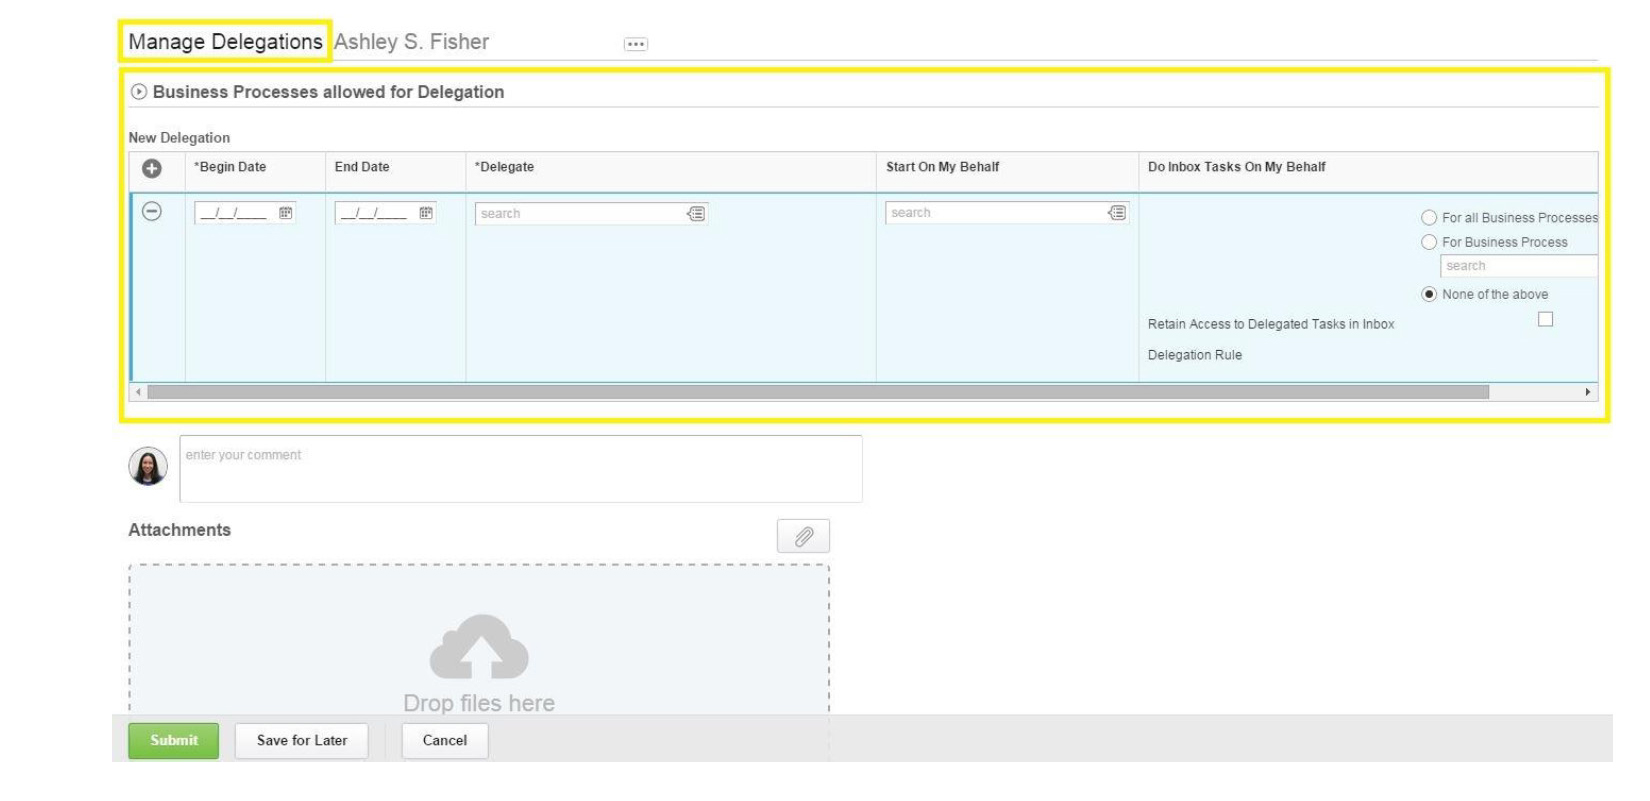
3. Under New Delegation:
- Under Begin Date, type or select the date you want the delegate's task to start. Use the calendar icon if needed.
- Under End Date, type or select the date you want the delegate's task to end. Use the calendar icon if needed.
- Under Delegate, type or select the name of the person you will be delegating the task to.
This is the person who you will be delegating spend authorizations and expense reports to.
- In the search box, type the first name and last name of the person and press Enter.
- You can also use the Prompt to select a name from the drop down menu.
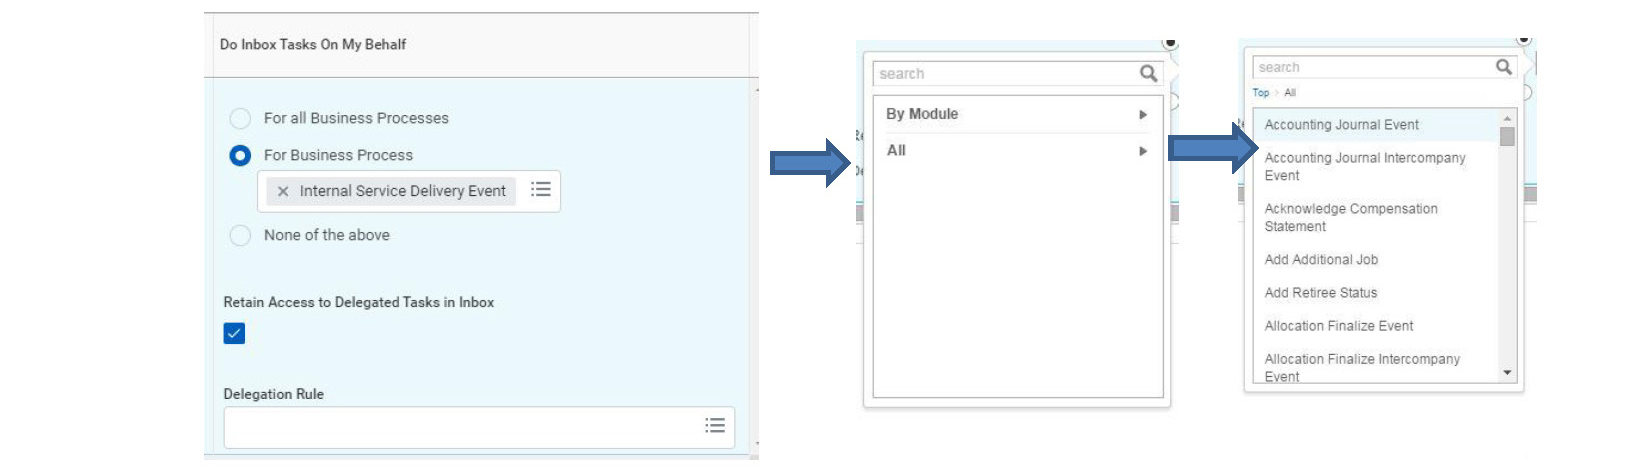
- Under Do Inbox Tasks On My Behalf:
- Select For Business Process.
- In the search box, type the task or use the Prompt to select the task.
- Type Internal Service Delivery Event and press Enter.
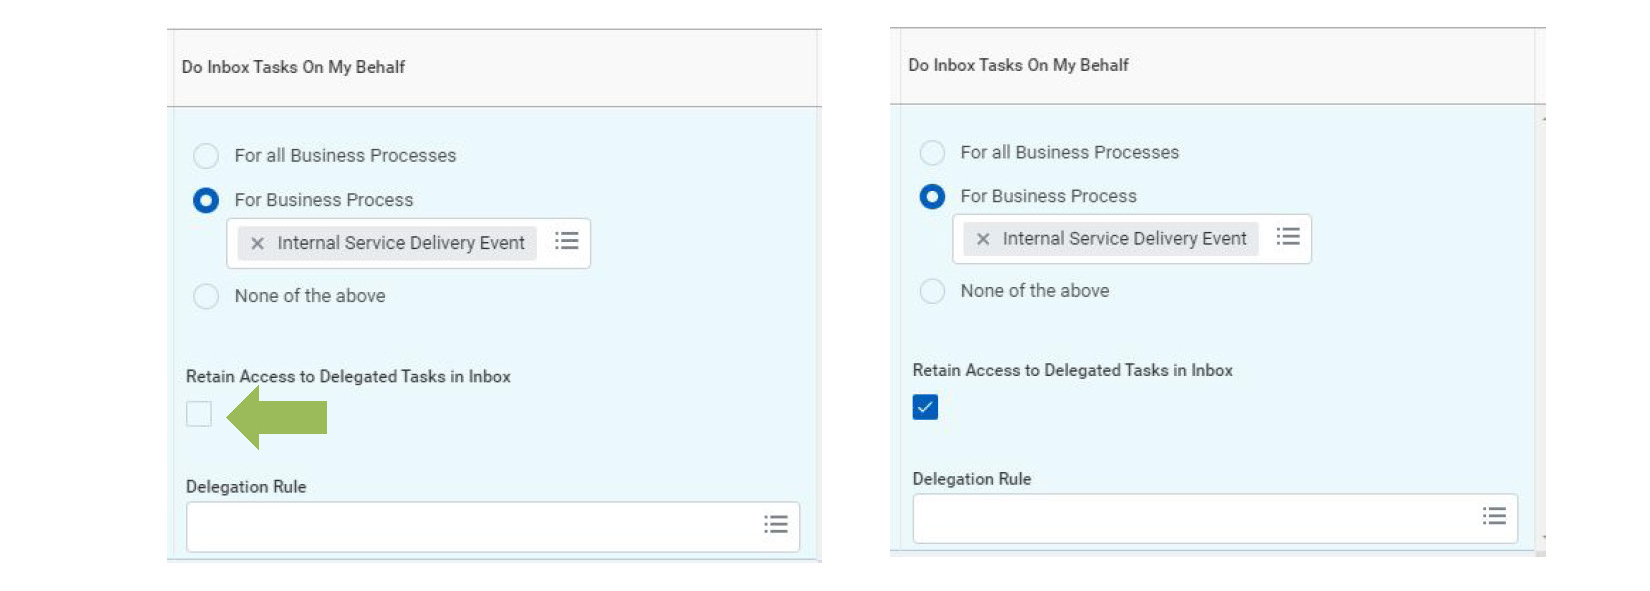
- For Retain Access to Delegated Tasks in Inbox:
- If you do NOT want to see the tasks in your Inbox, but want them sent to the delegate for further action, do NOT click the box. Only the delegate will see the tasks as they come in.
- If you want tasks posted to both your inbox and the delegate's inbox for further action, click the box to place a checkmark. Both you and the delegate will see the tasks as they come in.
4. When you finish completing the New Delegation section, click Submit for final approval.
Note: No attachments are needed.
5. The next step in the approval process will display.
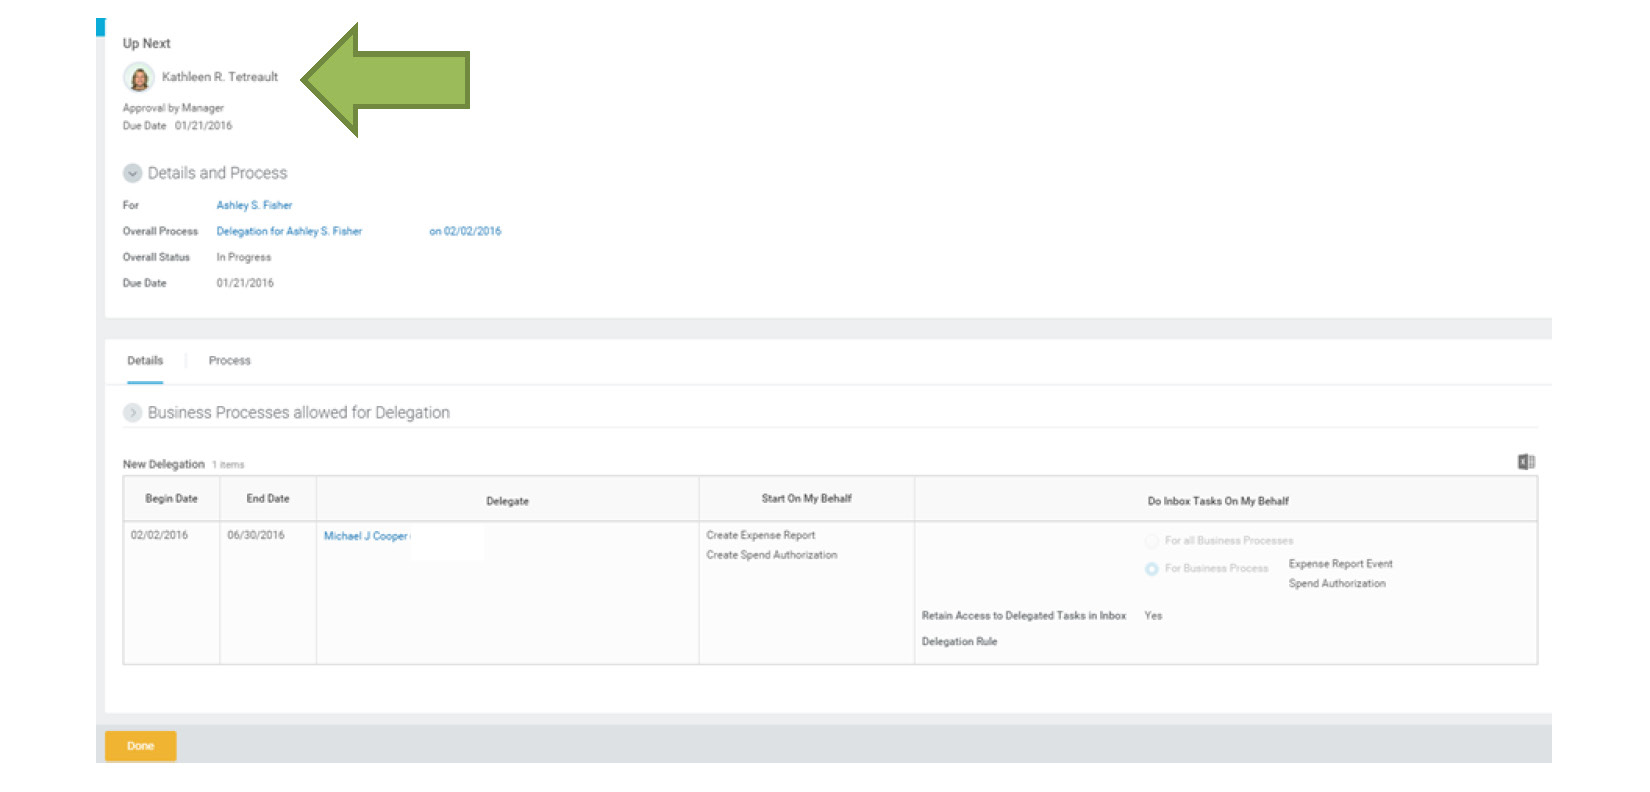
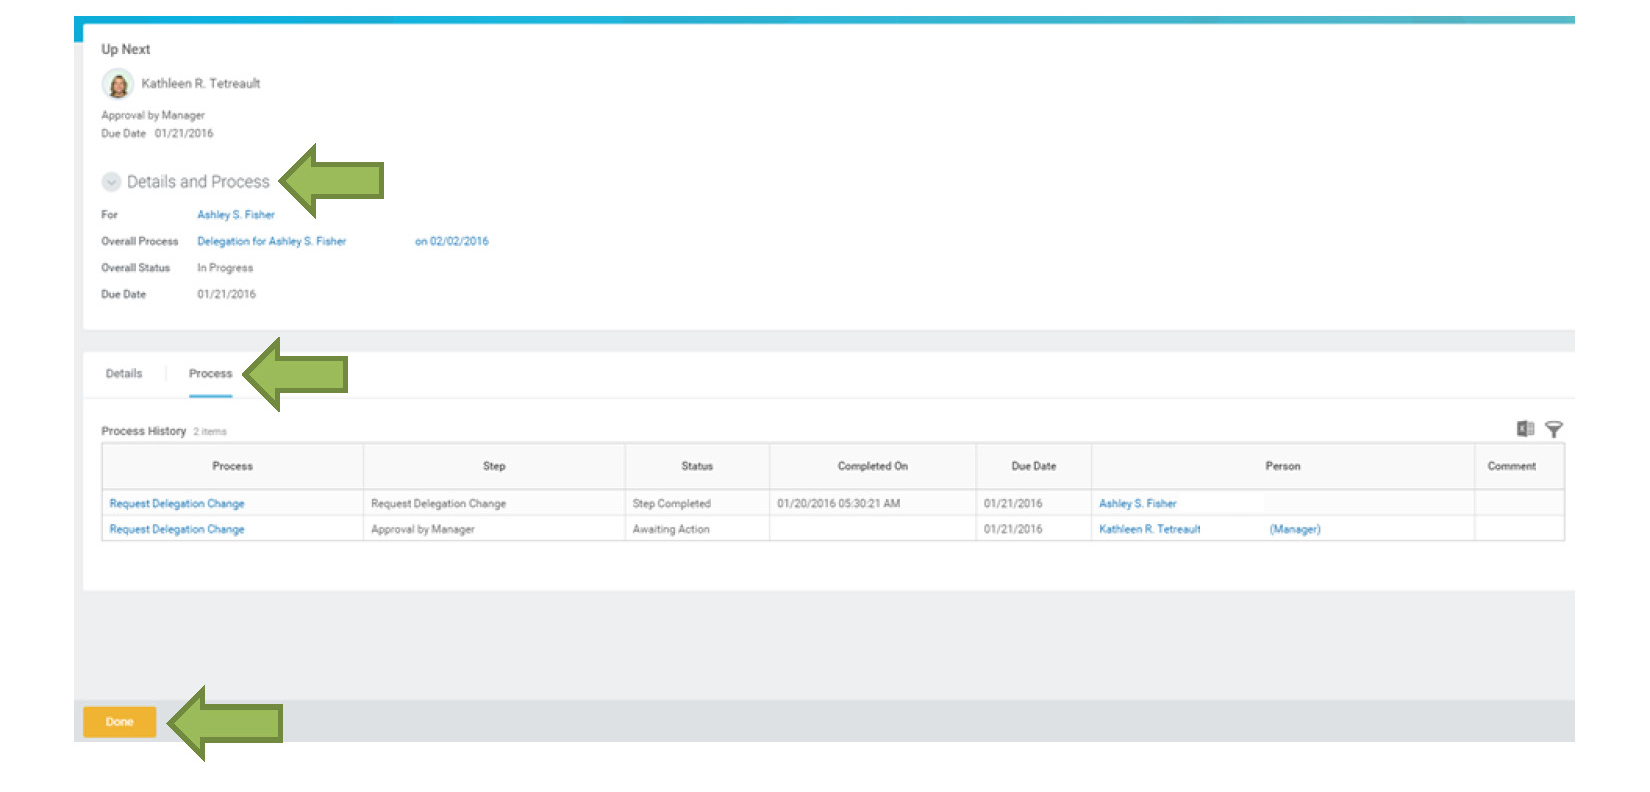
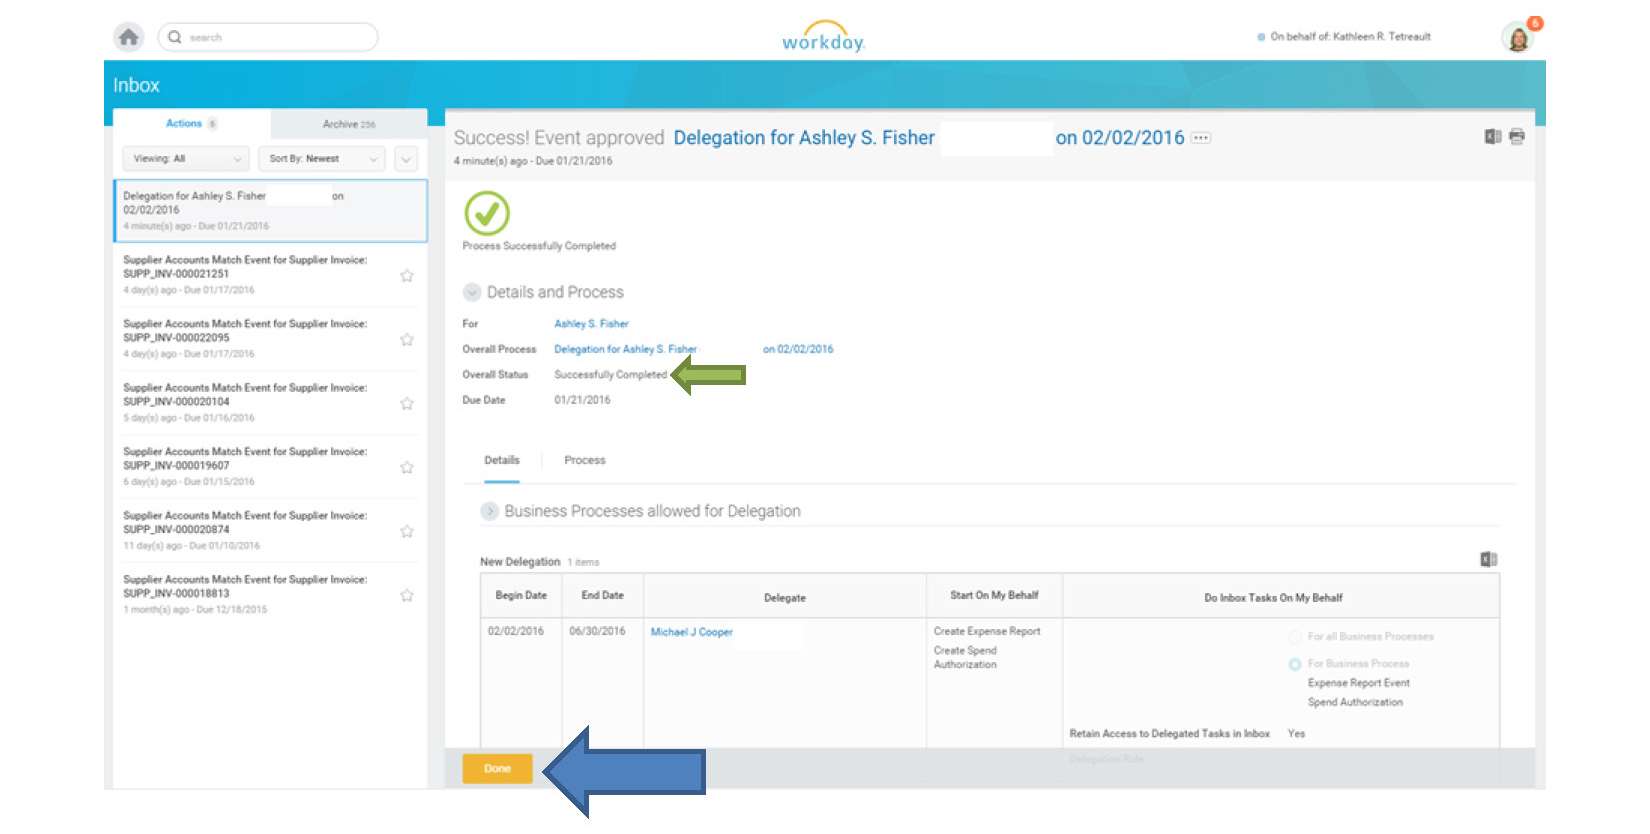
6. You can check the status of the approval process by clicking Details and Process.
7. Click the Process tab to check the status.
8. Click Done when complete.
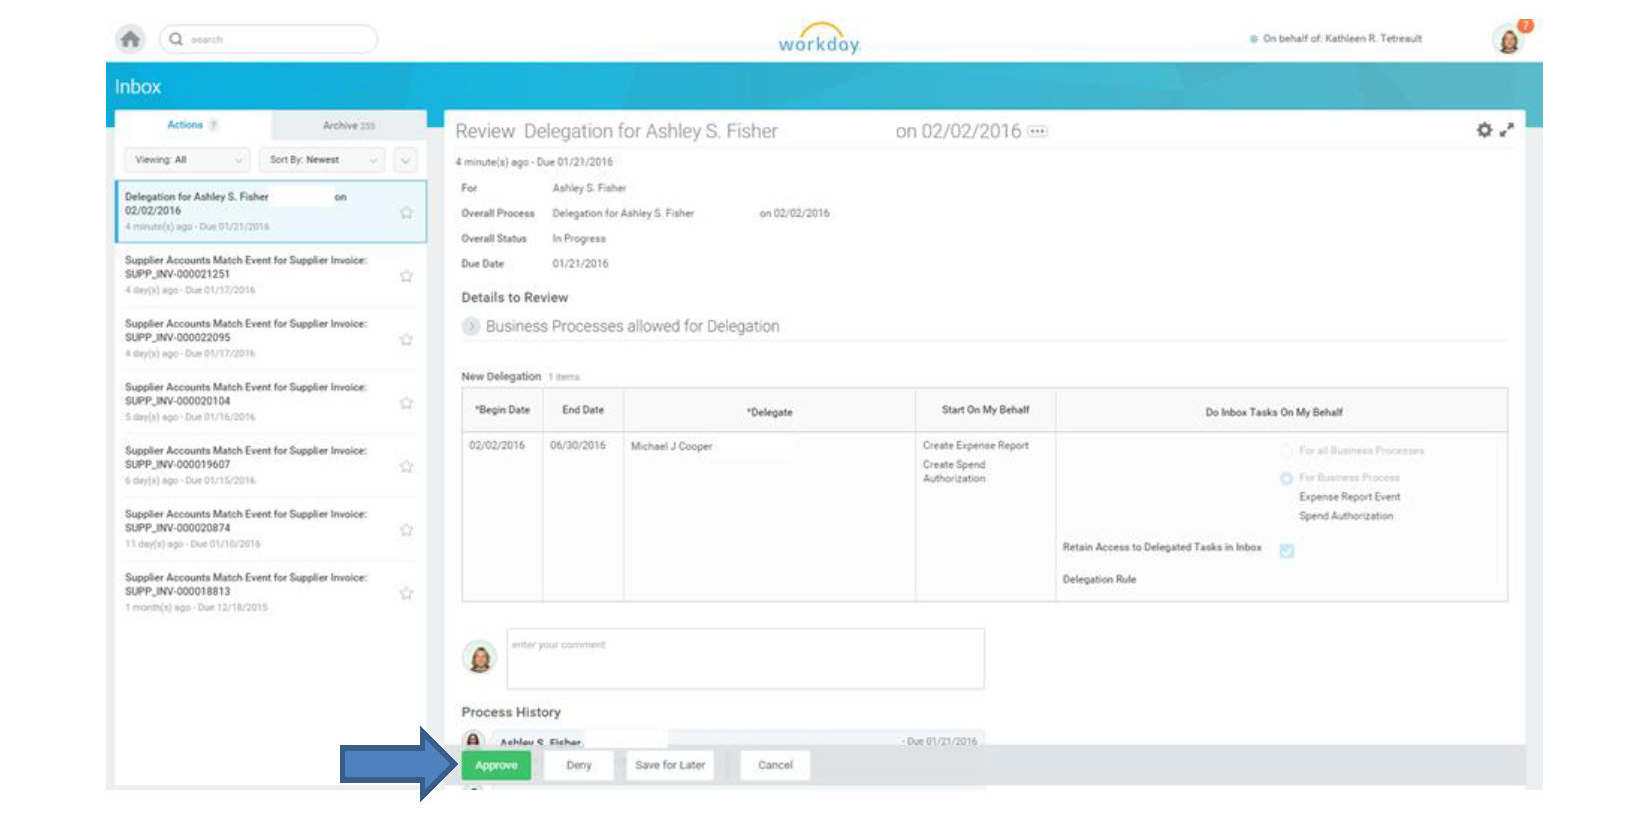
9. The Manager will need to approve the delegation.
10. Click Approve.
11. The Success page will display.
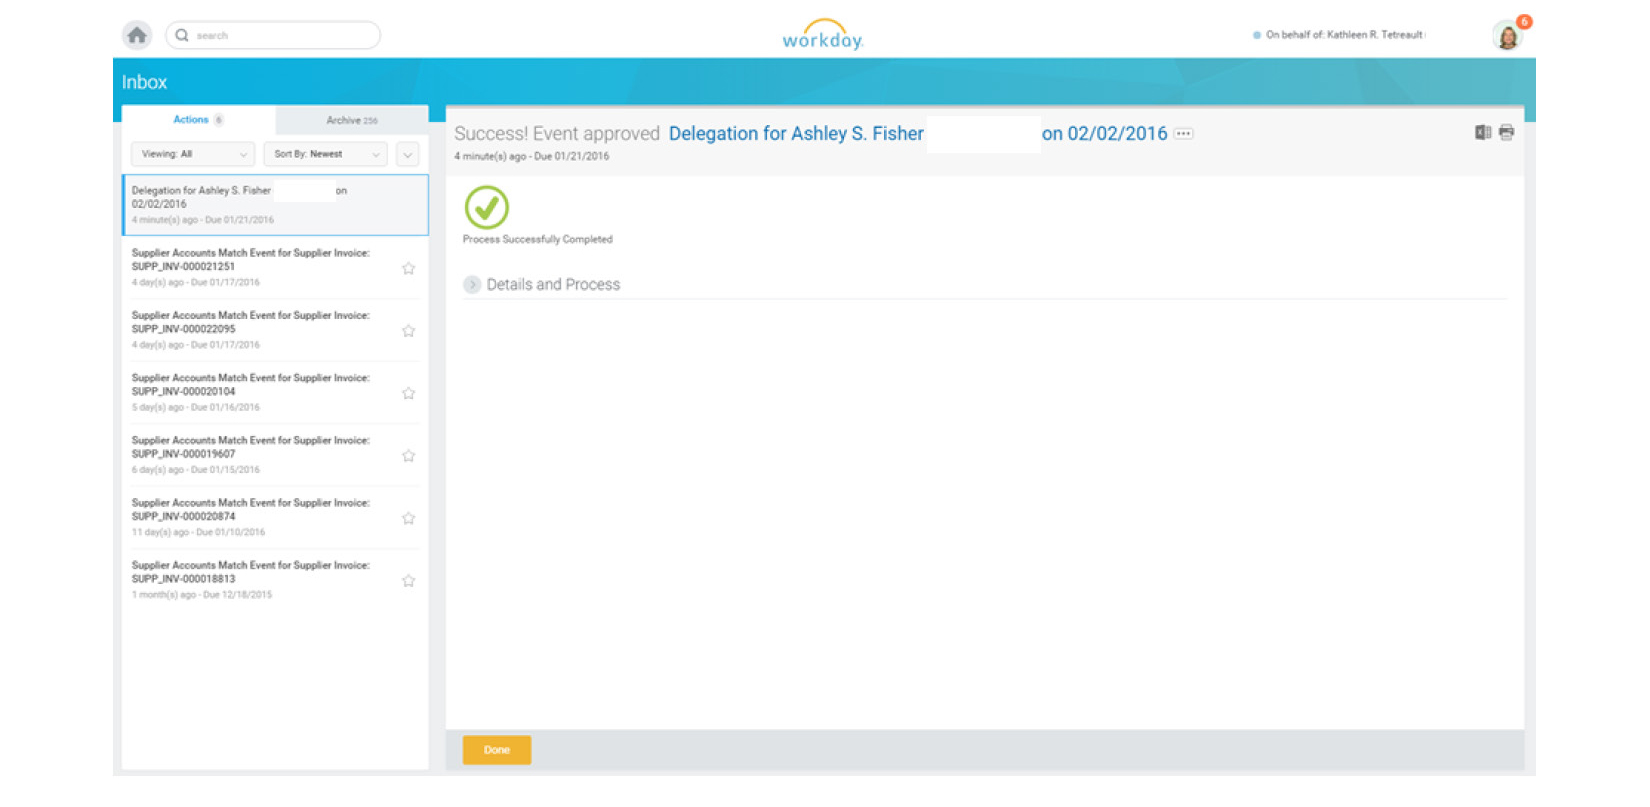
12. The Overall Status will state Successfully Completed.
13. Click Done.
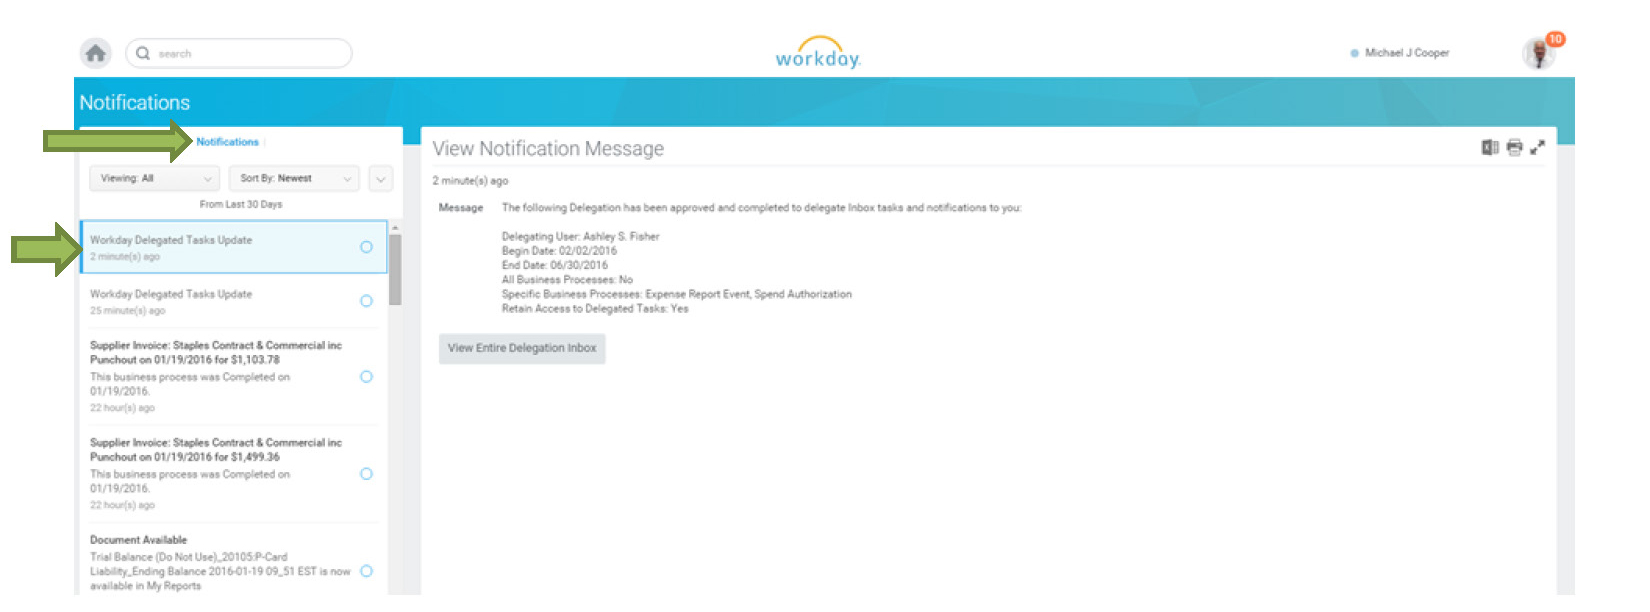
14. The Delegate will receive a Notification.
15. The Delegate is notified about the Delegated Task(s) from the Delegator.